

Paper Mache Knight Helmet Tutorial:

1. collect your supplies:
- flour
- water
- measuring cup
- mixing bowl
- newspaper
- balloon
- paint
- paint brush
- brads
- scissors (and utility knife)

2. mix flour with water (ratio 1:2). For one helmet 1 cup of flour and 2 cups of water
3. cut newspaper into 1 inch strips
4. blow up balloon about the size of your child's head

5. dip paper strips in paste, pull through fingers to wipe off excess paste and place on balloon.
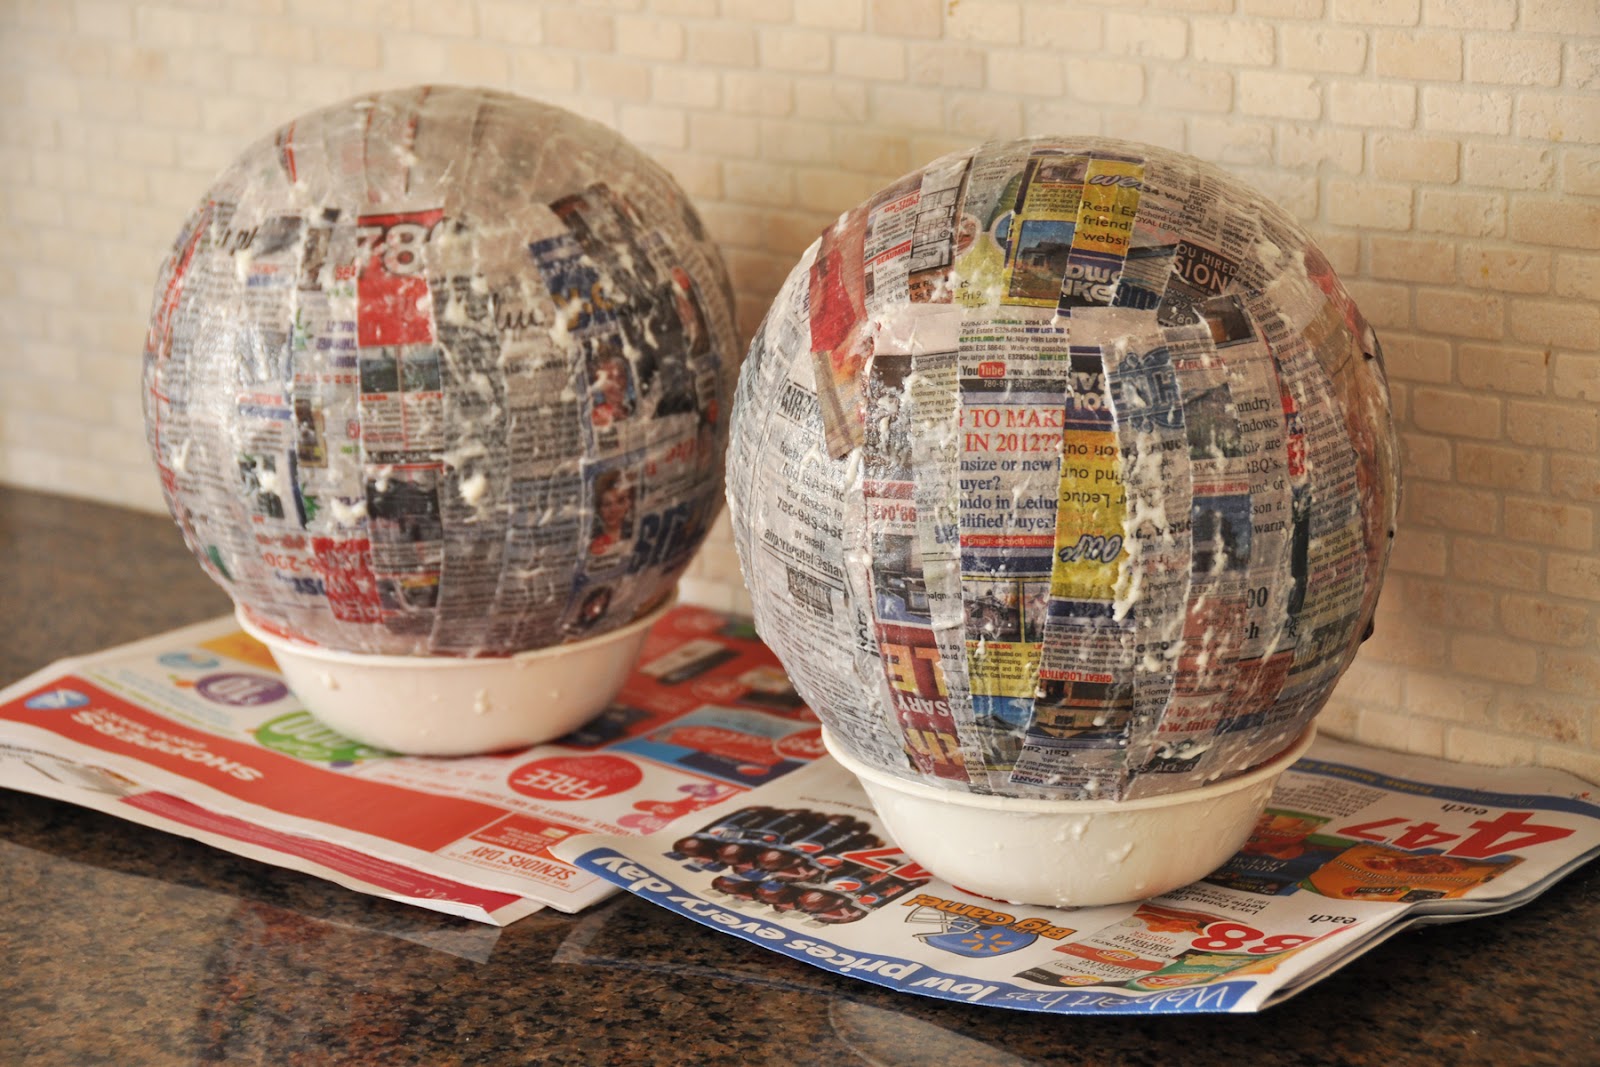
6. once several strips are on balloon it helps to place balloon in a (cereal sized) bowl to hold it up.
7. apply about 5 layers of strips to balloon covering top 4/5ths of balloon. It helps to place strips in different directions for each layer to strengthen helmet.
8. allow to dry overnight (or longer)


9. paint (wear safety goggles if you wish, for extra style make sure they are swim goggles)

10. pop balloon and remove balloon
11. cut out helmet shape. Use piece you cut out for mask part. Cut this part into an oval shape and use your utility knife to cut slits from the middle.
12. Use utility knife to poke holes in sides of mask and helmet where you want to attach it.
13. Poke brads through these holes to attach
 |
| Cardboard shields |
 |
| *This is how Anja dresses pretty much every day when at home. |
...And now you have a knight to keep your house free of dragons. :)
Thanks Maja, this was perfect for my Special Education class. They loved the finished results
ReplyDeleteHi Maja,
ReplyDeleteI know this is an old post, but it's really relevant in our home today! I wouldn't know where to start in creating this helmet for my son without your help. I hope you family is well and safe.
Best Wishes,
Rach